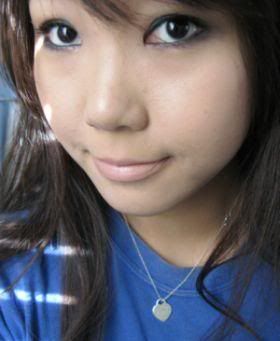
Hiya all! Sorry for being away so long! I was finishing up my last round of auditions for college :) Stopped by Chicago for Northwestern, and New York for Manhattan School of Music and NYU. The professor at Northwestern, Hans Jensen is super nice~ he even gave me a lesson after my audition! As for MSM, sadly, my first choice teacher, David Soyer, passed away on Thursday, 2/25/10--just the day after her turned 87. He was my teacher's teacher as well, and not to mention, a definite renowned cellist in the world. He will be terribly missed. NYU, everyone was so friendly! And... NO ONE is going to believe this, but... THE GREAT Itzhak Perlman was in my audition, and commented "brava" to me! :)) Too bad I didn't realize it was him till as I was walking out! I just kept thinking--"wow. that guy seriously looks like Perlman..." GG me.
ANYWHO!! Onto the long-awaited post! This post is dedicated to all those drugstore queens ;) Everyone loves a great deal. I've listed everything I could think of (at the moment) that I buy from the drugstore. All these items mentioned are terrific, and are department store worthy. Enjoy!
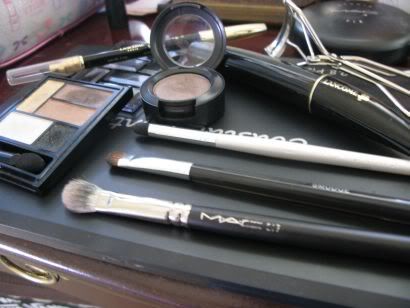
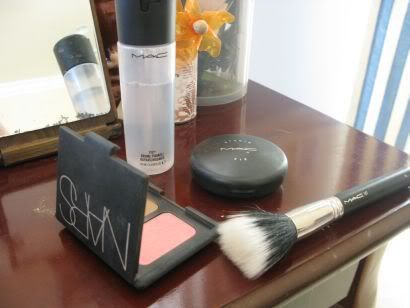
NOTE: Photobucket is being REALLY annoying atm, and won't let me upload any pics... so this post will looks a lot more friendlier once the pictures come up!
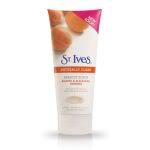 St. Ives Apricot Scrub
 in
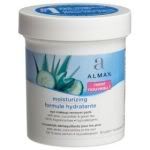
Blemish & Blackhead Control: This is supposed to be in random order... but this one is an exception. This has got to be my number one drugstore product. This is my HG daily cleanser. I use it 4-5 times a week, and use a foaming cleanser when my skin randomly gets sensitive. When I don't, I just use it everyday. Some people use it just as an exfoliator, but it's gentle enough to be a daily scrub. This seriously does what it claims to do! Keeps blackheads away, and skin blemish free. If I switch cleansers, but maintain the rest of my skincare routine, I'll still break out. This product is one of my key items for maintaining clear skin! I give this a 5/5.
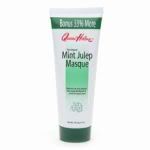 Queen Helene Mint Julep Masque
: You've heard the reviews and raves about this product! I've written a detailed review and demo on a previous post. It's basically a clay mask that dries up hard as a rock. As it dries, it dries up your acne pimples along with it! Also, the product claims to remove blackheads--at first, I didn't think it'd happen; just one of those false flashy statements, ya noe? But boy, was I wrong! This seriously gets RID of blackheads so well, it's scary! I use this about twice a week, and it keeps me from breaking out :))
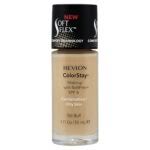 Revlon Colorstay Foundation SPF 6
: If you have oily type skin, "Drugstore foundation? Gross!" is the most common thought that comes to mind. Drugstore foundations tend to have only one formula for "all skin types" how on earth does that even work out the slightest bit...? Well, Revlon has the solution for oily/combination skin types! Alright. Even for the dry/normal skin folks too. This foundation is part of their Colorstay line, and boy, it does what it says! Once you apply it, it really sticks to your skin! It's nearly impossible to blend because it sticks so quickly! The key is to stipple it on the face. If you wear it alone, it'll eventually slip and slide, but if you set it with some powder... I guarantee, your face will stay on the ENTIRE day, along with some occasional blotting/powdering. This truly is a department worthy product.
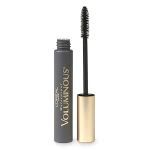 L'Oreal Voluminous Mascara
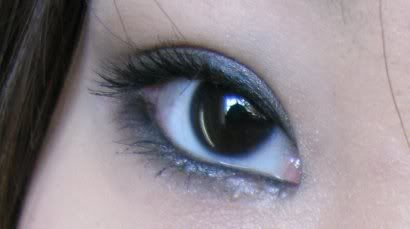
: This is, by far, the best volumizing mascara out there! (well, under $10) This mascara seriously gives you the effect of false-like lashes that fan out. With just the first coat, you can automatically see your lashes have become 4x thicker and fuller. It does have a tendency to clump a bit, but that's what makes your lashes even more voluminous! This mascara is the perfect compliment to smokey eyes. The one pictured is the original one, but it also comes in a Carbon Black shade, which is the ultimate black color for a seriously intense look. Go for the waterproof version since it has more wax. It'll flake less and hold a curl longer.
 Almay Moisturizing Eye Makeup Remover Pads
: The only product that was ever able to remove ALL of my waterproof mascara + liner was Pond's Cold Cream (which is amazing, but a little messy/non portable to use!). I was introduced to this product by a fellow blogger! She used this on one of her posts, and I noticed how it seriously got ALL of her intense eye makeup off (I can't remember her name! =.=;;). This makeup remover is absolutely fantastic. It gets off ALL of my eye makeup (which consists of a TON of waterproof mascara that tends to run on my eyes for the next 2 days even after removing it). Inside the container, there are pre-moistened circular pads. I use one pad--each side for each eye. The version I use is the moisturizing one, but Almay also makes one oil free. It comes in a purple container. I recommend this, tons! I've heard fantastic reviews about the Boots No. 7 Botanics eye makeup remover as well, but that requires you to use your own cotton pads! :p [cheapo here]
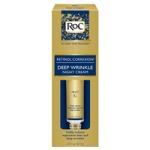 ROC Retinol Correction Deep Wrinkle Night Cream
: This is my current night cream, and let me tell you... it actually works! In the morning, my skin seriously feels more tight and firm. I don't have wrinkles now, but I definitely want to prevent any from happening! It's non-greasy, but moisturizing. It smells nice too! ROC even guarantees that your skin will transform after the first week of use, and I can't agree more. A great night cream that suits anyone from beginners to mature skin!
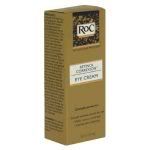 ROC Retinol Correction Deep Wrinkle Eye Cream
: My current eye cream as well! Both the night cream and eye cream have been selected for Allure's Beauty Choice Award, and they deserve it! I never liked eye cream because they were always too oily and would clog up the pores right below my eye area, giving me blackheads. I'd been using Shiseido's Benefiance Eye Cream, and that SERIOUSLY clogs up the pores around my eye area! As for Clinique's All About Eyes, it does NOTHING. Don't even bother to purchase that. Anywho! This product is definitely oil-free, and glides on smoothly. It's really hydrating without that nasty greasy feeling. Definitely reduces puffiness!
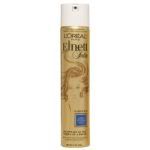 L'Oreal Elnette Hairspray
: I have tried COUNTLESS amounts of hairsprays, and NONE can compare to this one. This hairspray comes from L'Oreal's professional line, and it's utterly magnificent. I have pin straight hair that NEVER wants to hold curls more than 10 minutes--after that mark, it becomes wavy. I've tried nearly all drugstore brands--Aussie, Tresseme, Pantene, Garnier Fructis, Bed Head, L'Oreal (their normal hairsprays), Finesse--and they all weigh my hair down, make it greasy, and don't do their jobs. I've even tried higher end brands, like Sebastian, and Redken. This hairspray is non-sticky, and ever so light. It holds hair very well, but still allows hair to look natural and remain flexible. You can purchase this hairspray in some CVS & Target (for sure), or other drugstores, if you're lucky. The full sized cans cost a bit over $20, but it's definitely worth it.
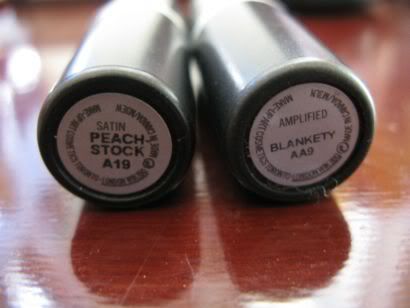
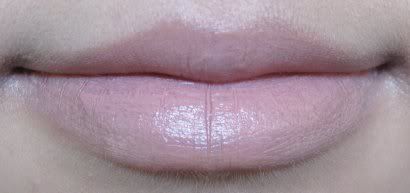
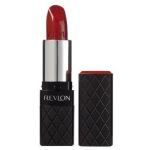 Revlon Colorburst Lipsticks
: This is Revlon's most recent line, and I have to say, it's fantastic so far. These lipsticks are super creamy and long lasting. I cannot believe how pretty and wearable the shades are! They're very well pigmented, and the colors are very simple. Revlon offers colors from light pinks to dark, to fuschia, a classic red, to a more modern red. They even offer the most perfect shade of nude (which is by far my fav). These lipsticks are very comparable to MAC's lipsticks. You seriously can't put on MAC lipsticks without moisturizing your lips before, or your lips with be flakey and gross. These lipsticks by Revlon are so moisturizing and creamy, you don't necessarily have to! LOVE the formula. The finishes are satiny, and have a glossy look to it.
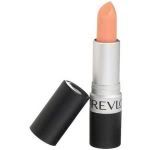 Revlon Matte Lipsticks
: Finally, the last one! And surprise surprise, it's another Revlon product. Revlon launched their Matte collection last year, along with some matte eyeshadows and liners. The lipstick line brought to the market, the infamous shade, "Nude Attitude." These lipsticks are very pigmented, and are truly matte lipsticks. They're very similar to MAC's matte lipsticks. You have to moisturize your lips ahead of time, since after all, they are matte. The line offers fantastic shades of pink, nude, red, coral, and orange. Probably the only matte lipstick you can find at a drugstore!
At the drugstore, I also purchase my CVS cotton pads :)) which I use daily for my toner. I also use qtips! Besides those, i've named all the drugstore products I use. I don't usually like to buy eyeshadow from the drugstore because they're usually really big misses. But out of all the drugstore companies, Maybelline has the best pigmentation in their eyeshadows, hands down. Also, a lot of people like Revlon's Colorstay Retractable Liner, but that smears like no other on my eyes. Oh! I almost forgot to mention--L'Oreal's Carbon Black Lineur Intense (liquid liner) is amazing! The felt tip is long and very easy to use. It's a perfect dupe for Lancome's.
I have SOOO many pictures from my audition trips to San Fran, Cleveland, Chicago, and New York! I'll upload them as soon as I get them sorted and resized! :)) I've changed my skincare routine a bit, and my skin has been absolutely terrific. I'll share those as well! Also, i've been playing around with different foundations and powders, so i'll keep you guys posted on that too!
Stay tuned for all those updates! Now that my auditions are over, I have time to blog! :) <3
later homefries~
UPDATE: WHOO! PICTURES AGAIN!!

Best,
Jinna